
- Home Kitchen Wrap GuideInstallation
Installation: pro vs DIY.
A flat-fronted kitchen is genuinely DIY-friendly for a competent weekend warrior. Curved doors, profiled shaker fronts and waterfall benchtops are trickier and benefit from a pro. Here’s everything we’d tell you over the phone.
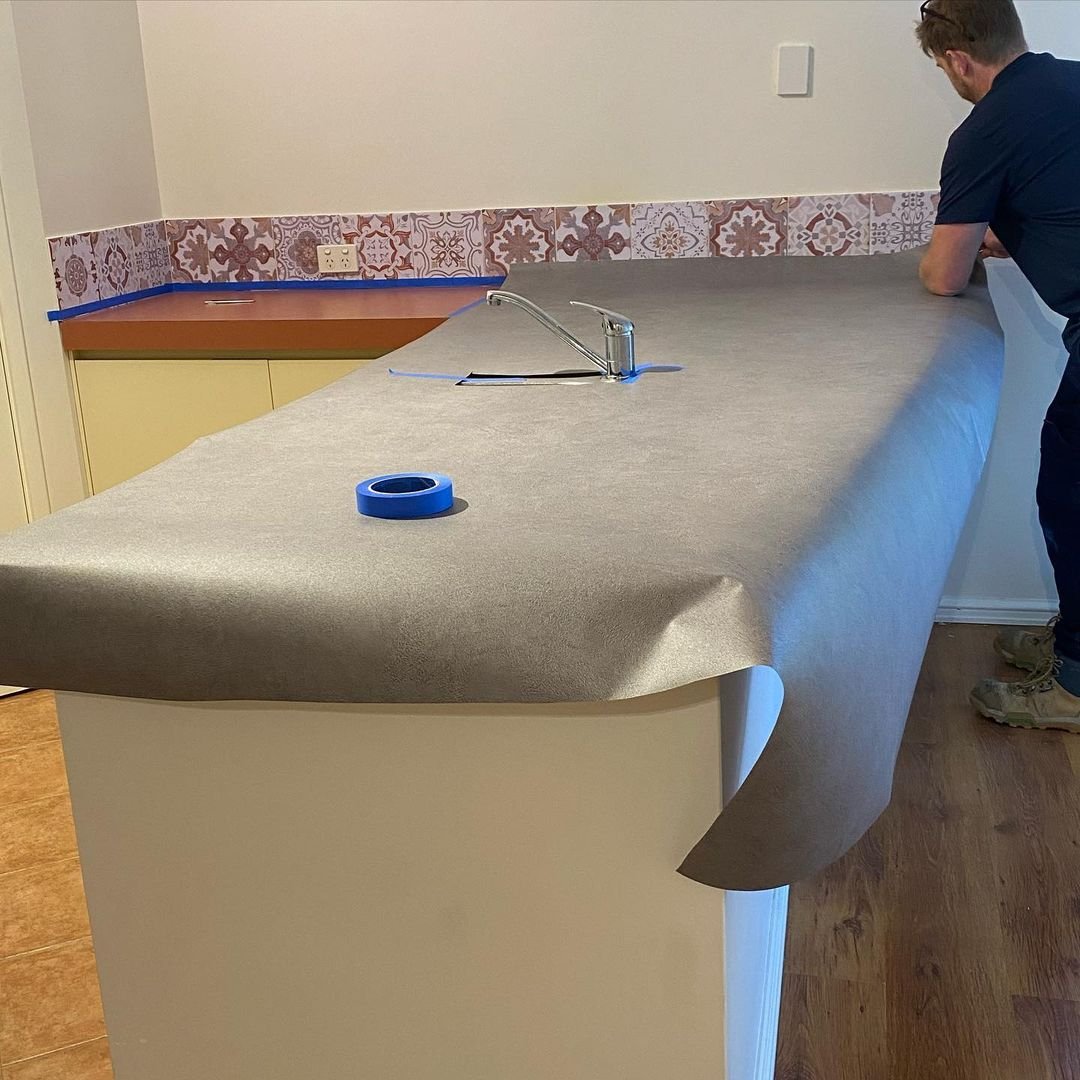
Mid-install
A stone-look wrap being applied directly over a laminate benchtop. No demolition, no joinery changes the old surface is the substrate.
Tools you need
- Felt-edge squeegee (the most important tool)
- Sharp craft knife with fresh blades
- Heat gun (a hairdryer on high will do for flat work)
- Microfibre cloths
- Isopropyl alcohol (≥90% strength)
- Sugar soap or kitchen degreaser
- Fine sandpaper (320–400 grit)
- Tape measure, pencil, masking tape
- Magnetic screwdriver for door hardware
Total tool spend if you’re starting from scratch is around $80–$150. The squeegee and heat gun are the two purchases that materially affect quality.
Surface preparation
This is 70% of the job. Get prep right and the install almost takes care of itself.
- 01Remove doors and hardwareTake off cabinet doors, drawer fronts, handles and hinges. Label each on the back with painter’s tape and a number so refit is foolproof.
- 02Degrease everythingSugar soap or kitchen degreaser, scrubbed in, rinsed off, dried thoroughly. Kitchens have invisible oil films even on cabinets that look clean. This is the single most-skipped step.
- 03Light sand320–400 grit by hand, just to dull any gloss. Don’t cut through topcoat. Wipe dust off with a damp cloth, then dry.
- 04Isopropyl wipeFinal pass with 90%+ isopropyl alcohol on a microfibre. This removes anything left behind and gives the adhesive a clinical surface to bond to.
- 05Warm the surfaceIf installing in winter or in a cold garage, gently warm the substrate to 18–22°C with a heat gun before applying. Cold surfaces resist adhesion.
DIY install method
- Lay the door face-up on a clean trestle or table covered with a soft drop cloth.
- Cut the vinyl roughly to size with 30–50mm overhang on every edge. Don’t pre-trim to exact size.
- Peel back 10cm of the backing paper at the top edge. Align the exposed adhesive on the door, press lightly to tack.
- Working from the top, slowly peel the backing while squeegeeing the film down. Centre-out passes, firm pressure, slight overlap.
- Wrap edges by lifting the door, applying gentle heat with the heat gun, and tucking the film around. Cut a 45° mitre at corners with a fresh blade.
- Trim the back overhang with a sharp blade, leaving a 5mm wrap-around for adhesion security.
- Reseat hardware (use a hot needle to pre-pierce the screw holes don’t drill cold through wrap, you’ll tear it).
- Cure for 24–48 hours before heavy handling.
Common mistakes
- Skipping the degrease. Wraps de-laminate within months because of an invisible oil film.
- Not using a squeegee correctly. Always work from the centre out, overlapping passes, with firm pressure.
- Cutting on the substrate. Cut on a backing card, never on the door deep blade nicks ruin the underlying surface.
- Stretching the film around tight curves. Architectural vinyl is conformable but not infinitely stretchy. Use heat to soften and relax it; don’t pull.
- Wrapping in a humid bathroom-style kitchen with no ventilation. Open the windows, run the rangehood.
When to hire a pro
- Profiled shaker doors with raised panels and recesses
- Curved cabinet doors or rounded handles integrated into the door face
- Waterfall benchtops or wrapped island ends with mitred edges
- Splashback work behind cooktops where heat clearance matters
- Kitchens you’re prepping to sell within 6 months the seam quality has to be perfect
In Perth, our in-house crew handles all of the above as a matter of routine. Outside Perth, ask in your quote if we have an installer we trust nearby.